
Take a look at our 100+ release notes and you’ll see that our development team is continuously improving Ycode and adding new exciting features. And that’s us just getting started!
To give you even more building flexibility, we’re happy to announce that we’ve added thousands of new features!
Okay, okay, maybe not us per se but our talented, nifty friend: Zapier. 🤓
Zapier connects web services and apps with the goal of turning tedious, manual tasks into automated workflows that run by themselves. With Ycode and Zapier teaming up, you can choose from a whopping 4000+ apps to build workflows with. Talk about possibilities!
Read on to learn all about Zapier, the available Ycode triggers and actions, and how to set up a Ycode workflow step-by-step (as explained by your video host Marcin).
The cool thing about Zapier integrations
But first, let’s talk about smartwatches. 🤷♀️ (It’ll make sense, promise.)
You’re standing in front of a jewelry store, looking at two smartwatches in the window. At first glance, they look nearly identical. Then you read the description and realize that the left model can also measure your heart rate and keep track of the steps you take every day.
Which model would you prefer?
A lot of people would pick the watch with the most built-in features. More features in one device equal fewer separate devices.
Sounds logical… but there are also a few downsides.
For starters, the price tag might be higher. Plus, the added features can slow down performance, as well as make things more complicated. You could feel overwhelmed trying to figure out all these functionalities (which you might not even use).
The same goes for software. Though we could pack Ycode with every imaginable feature, we consciously select each functionality that’s added so you’ll have a better experience when building.
Ycode insight: Why we picked specific functionalities
Every new product starts with a blank slate. It’s up to the team to decide on a roadmap and handpick which features to develop (first). At Ycode, we collected many different no-code features we’d like to develop and then collectively decided to start with these first:
Airtable integration: Many no-coders work with data in Airtables, and this will make it much easier for them to manage databases.
Super intuitive workflow builder: Workflows are key in no-code web projects, and creating them should be a walk in the park.
User authentication: A must for membership portals, as it automatically creates login, signup, password reset, and more related pages.
However, as each web project is unique, you might find that along the way you’ll need a specific feature that isn’t built into Ycode.
That’s why we teamed up with Zapier—a really cool web service that allows you to connect to nearly any app you want, extending Ycode’s capabilities beyond what’s built-in.
Let’s talk about what the Zapier Ycode integration does in more detail below.
Zapier workflows explained
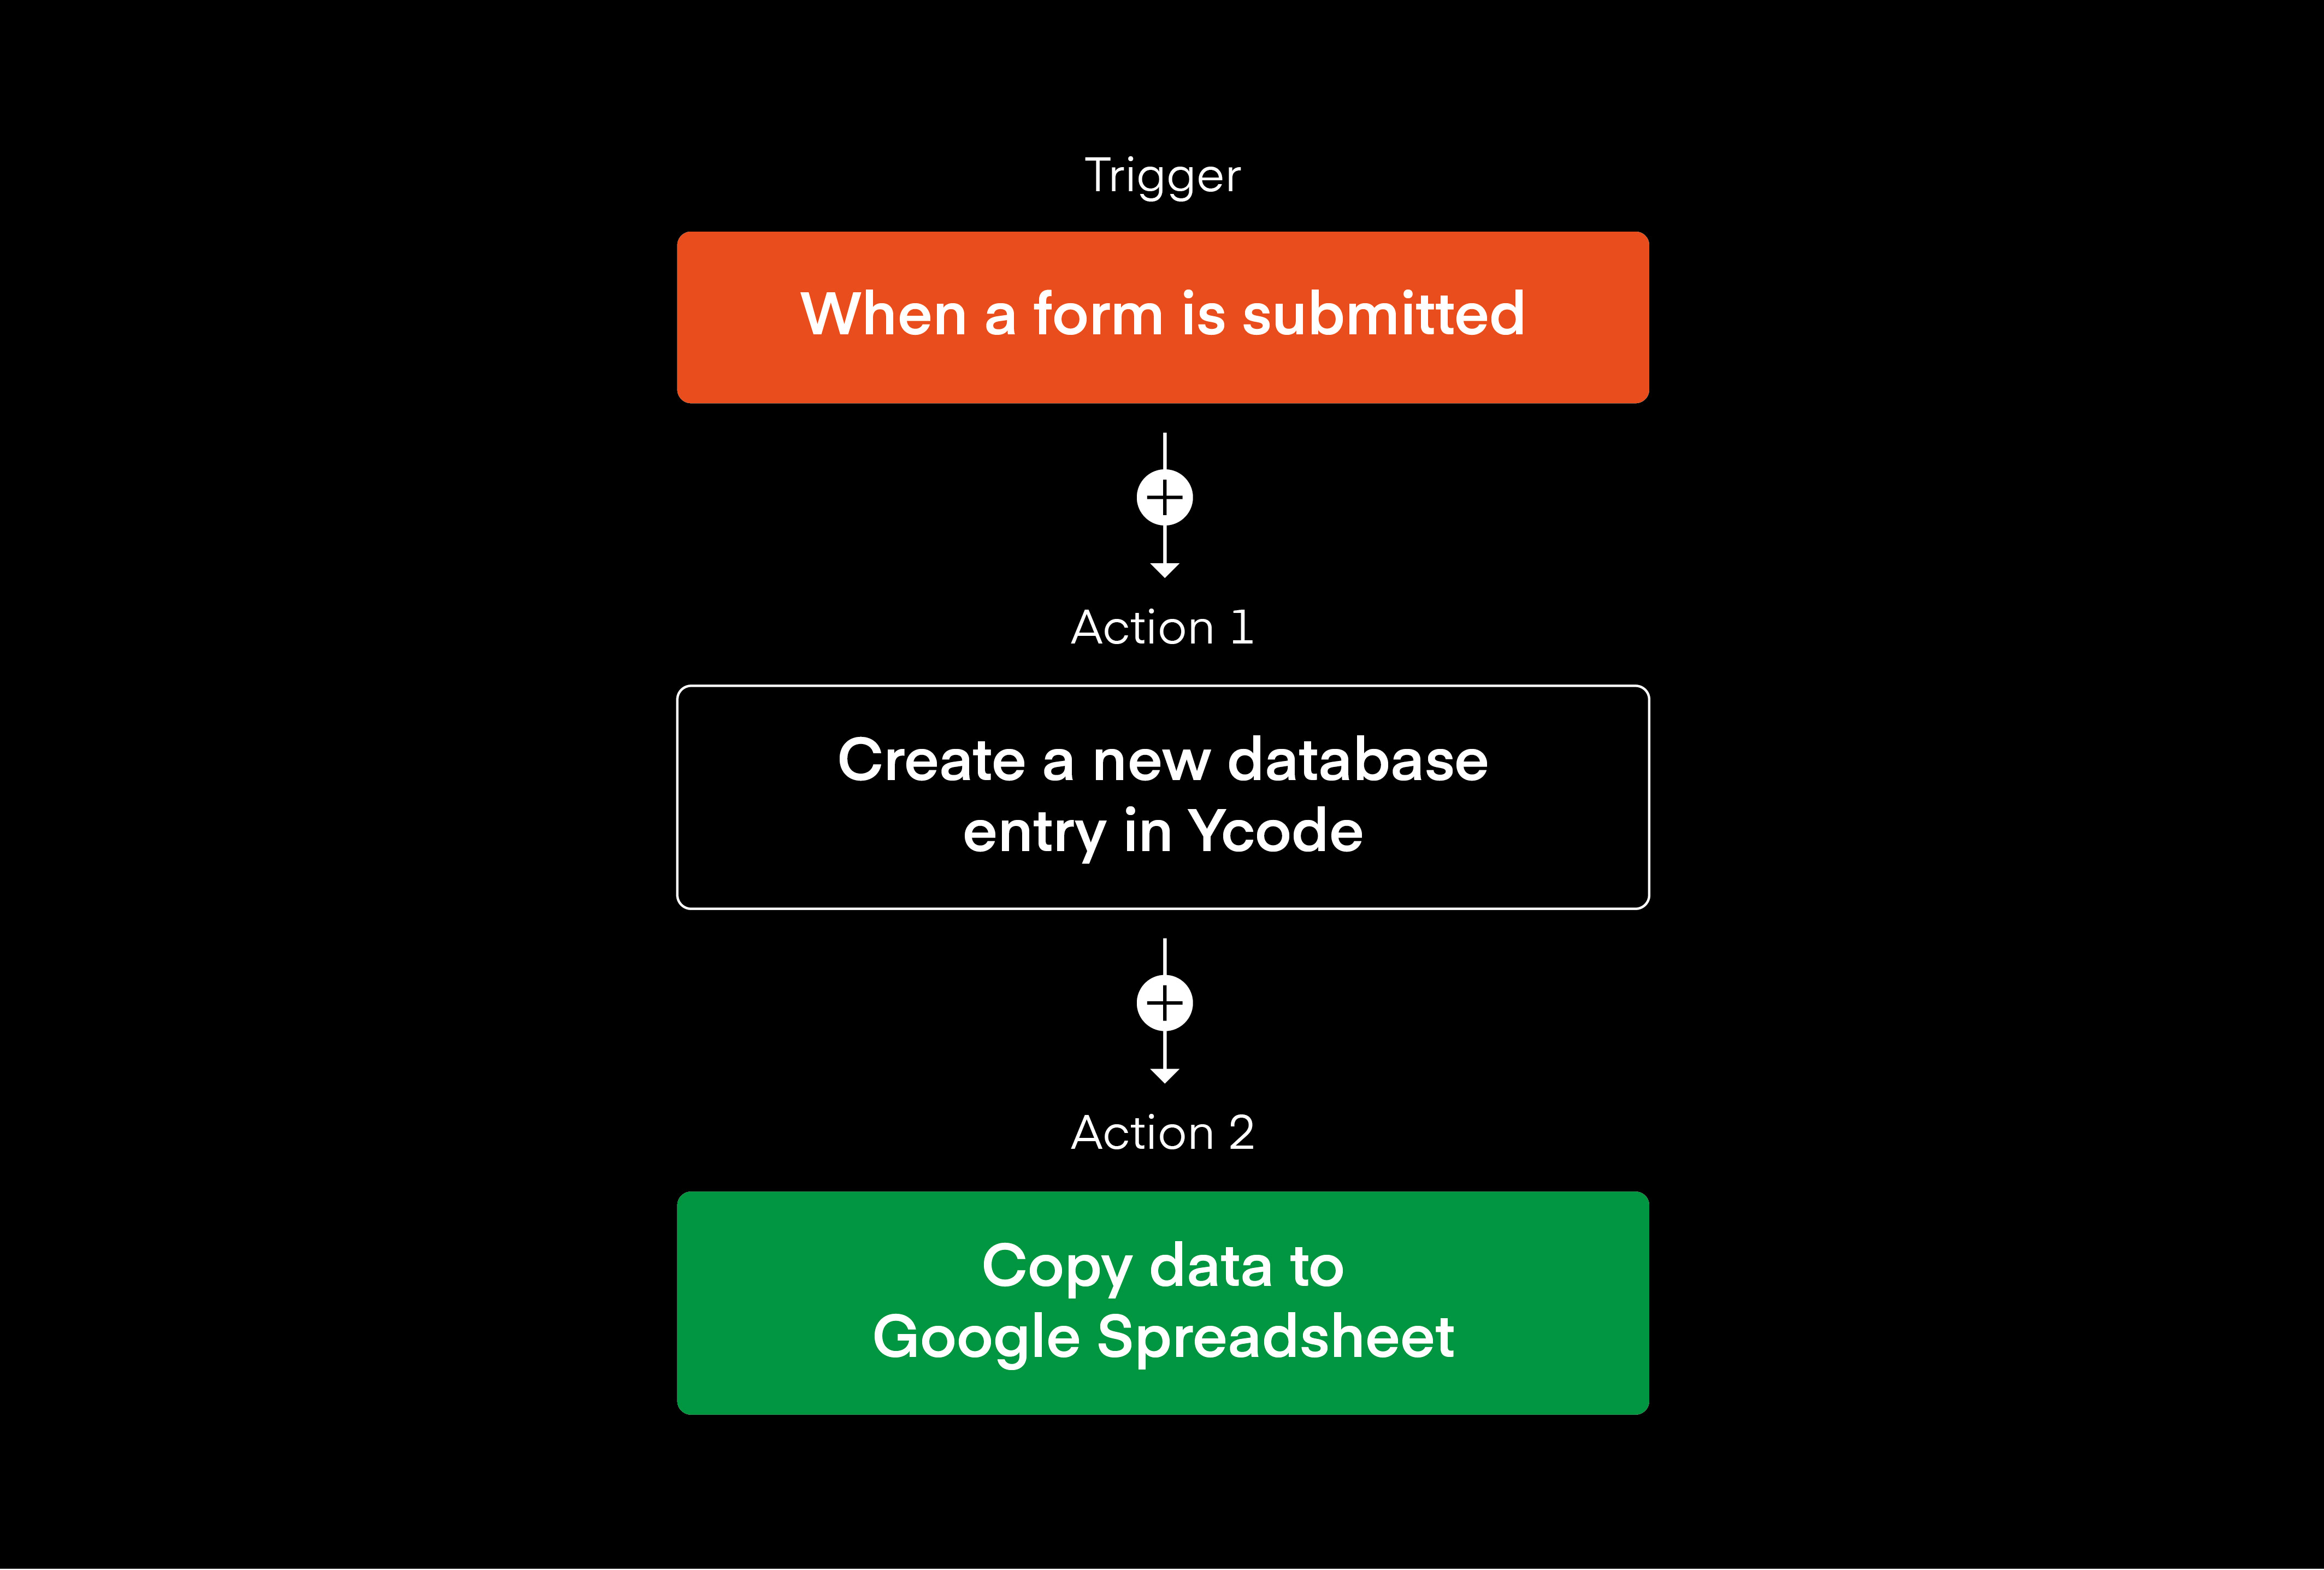
In Zapier, workflows are called Zaps. Each Zap has one trigger step, followed by action steps.
A trigger is an event that starts a Zap, or also, the app or service that triggers the action. Each workflow starts with a trigger. After the trigger sets the workflow in motion, you can add actions.
The actions mostly happen in the app(s) on the other end. Within one workflow, you can add actions from different apps.
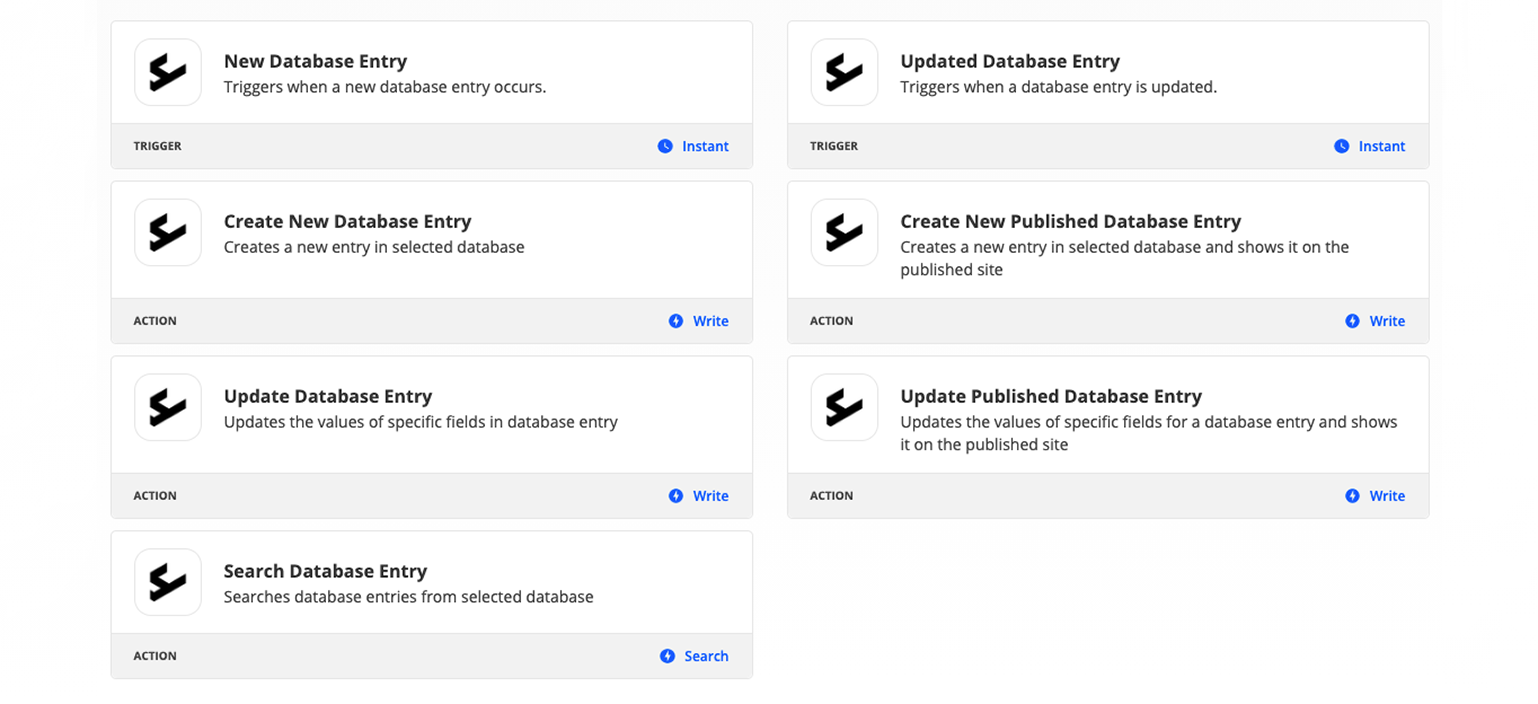
Ycode triggers and actions in Zapier
Currently, there are two triggers and five actions available for Ycode. Combined with the 4000+ apps available on Zapier, that gives you endless possibilities!
How to connect Zapier to Ycode
Before we can build any workflows, we first need to connect Zapier to Ycode.
Log in to your Zapier account (or sign up here). In your dashboard, select My Apps from the menu. Then click on the top-right Search icon and type in Ycode. Click on Connect (sometimes also called: Add connection).

Now you'll need the API token of the Ycode project that you'd like to build the workflow for.
Log in to your Ycode account. In the dashboard, hover with your mouse above a project and select the button with the three horizontal dots on the bottom right corner. In the drop-down menu, click Settings.
On the left-hand side, select Tokens. Click on Add API token, name it (e.g. Zap API) and select Create token.
Then Copy the token and close the pop-up.
Go back to Zapier, paste the token, and click on Yes, Continue. The Ycode Zapier integration is now successfully set up! 🥳

Workflow building: Post new Ycode database entries to Slack
Imagine you have a contact form on your website. Or perhaps even a comment form below your blog. Whenever a web visitor fills in the form and clicks “submit”, it’s sent to your database in Ycode and saved.
Naturally, you’re not manually checking every few hours whether someone sent you a message. It’s much easier to get a notification on an app that you do check regularly. Like your email inbox or, in this case, a Slack channel.
This Ycode Zapier workflow notifies you automatically in the Slack channel of your choice, showing the form data that you select. And below you’ll learn exactly how to set this up.
Workflow steps
Open the Ycode Zapier integration page. Under the headline, Popular ways to use Ycode workflows, click on Try it next to the Zap named: Post new Ycode database entries to Slack.
Connect to your Ycode account. Once you’re logged in, click on the account you’d like to use. Then press Next.
Select the database to which the new entries are added. Then click Next.
Wait a moment while Zapier is getting data from Ycode…
Select the Slack account you want to use. Then click Next.
Now select the exact Slack channel you want to post the notifications in. And again, click Next.
In the next screen, you can select the fields you want to edit in Slack. In this blog, the options are explained more in-depth. You can also use the suggested marked fields and just click Next.
Now it’s time to customize the Zap! For each of the fields you marked, you can now format the Slack message and choose True or False values. Below each value is an explanation of what it means. For the message, you can pick different variables depending on the database information you want to get notified about. Done? Thank you, Next.
Now it’s time to test the Zap. Click on Send test to verify your workflow. If you see the message in Slack, you’re all set. 🎉
As a final step, it’s time to turn on your Zap and let the automation work its magic!
Watch the video tutorial
What will you build with Zapier?
We’re curious to hear what Ycode x Zapier workflows you will use for your web project! Share that in Ycode community.
If you need help or advice with any of the workflows, write us a message. We’re happy to explain the instructions. 🤗
Get your project started today
Discover our intuitive visual editor, use built-in CMS collections, SEO features and launch your web projects with ease.